Showing posts with label recipes. Show all posts

Wednesday, August 19, 2020

Kitchen Floor Pickles

This is an old-fashioned, lacto-fermented pickle recipe that I got from my next door neighbor and garden buddy, Mavis. She shared a jar with me last year and they were THE best pickles I've ever tasted.

I used larger cucumbers than what it called for because that was what I had at the time. You cut them up later, after they've fermented for a month. I've made gherkins before by a similar process, but they only go about 5 days. On the second step, I am going to try using monk fruit, instead of regular sugar, since we are keto. I'm not sure I'll put the full amount in either. I am not certain how that will work out, but if it does, I will update and let you know!

ETA: 09/09/2020 -- Monkfruit worked out perfectly! I used about 1 cup, give or take. You can use as much as you want until they taste best to you. Since fermentation also utilizes some of the sugars in the cucumbers themselves, these sweet pickles are very keto-friendly. The larger cucumbers I used on this first batch still turned out good and crunchy. I was able to get a bunch of smaller ones for the second batch, which is pictured above. I decided I would also trim off the blossom ends as you do with regular pickles. There is supposedly an enzyme in them that can affect the crispiness, as I understand it.

Kitchen Floor Pickles

Using small to medium-sized cucumbers, pack tightly in a gallon jar. Add 2 tablespoons alum, 2 tablespoons salt, 1 cup whole mixed pickling spice, and 4 cups vinegar. Fill the rest of the way up with water. Cap and let set for 1 month. Be sure jar is glass or plastic. Shake jars often. (Rolling the jar across the floor each day is how this recipe got its name.) 

Remove from jar and wash thoroughly. (Wash jar too.) Cut in chunks and put back in jar. Add 4 cups sugar. Cap and shake jar. Shake until cucumbers are covered with juice. Pickles are ready to eat. Refrigerate.  

Have fun shaking! These pickles are delicious. And you don't have to can them. They won't last that long.  

Note: When I say wash, I wash with water only, not soap and water. Also, these pickles make their own juice while you're shaking them.

Thursday, April 28, 2011

Got Ramps?

We do!  Lots of them.  I've really been on a ramp kick the past couple of weeks and have been trying out some new ways to use them.


Ramps, ramsons, wild garlic, wild leek, spring onion...whatever you want to call them, I love 'em!  I'm just reclusive enough to not care too much if they are stinky.  LOL

If you've never had them before, I would describe them as having a sweet garlic flavor that kind of hangs around for a long time.  Maybe wait until the weekend to give them a try...

I cook with a lot of garlic and onions anyway, so their pungent, garlicky odor doesn't phase me. 

Members of the allium family are good for you!  They have antibacterial, antiviral and antifungal properties.  They're good for your heart health, help regulate blood glucose, are high in vitamin C and may even reduce your risk of cancer. 

Did you know that an irrational fear of garlic is called alliumphobia.  My mom has that...seriously. 


OK, before you all start to think I'm crazy, let me get on with the recipes.  Some of these are downright gourmet!

Save your root tips - plant your own patch!
My favorite way to eat them is fried up with bacon and potatoes, eggs on the side.  I've been tossing a few in omelets and wraps.  Slice some up and toss into your salad, accompanied by your favorite vinaigrette dressing.  They are often eaten as "spring tonic" greens, either sauteed in butter or doused with a little vinegar.  Most commonly, around here anyway, they are served up on the side with brown beans and cornbread.


If you don't have a secret patch of your own, tucked away in the Appalachian foothills, you'll often find them being sold by roadside or in your local farmer's market. 

I want to try all of these recipes I found, so I dug up a huge bag full.  They can also be frozen for later use if you happen to get tired of eating them every day for a month...


Last night I made Wild Garlic Focaccia.  I came across this recipe on Eat Weeds, which is a foraging blog from the UK.  They have ramps there too, but they call them ramsons.


This bread smells wonderful as it is baking.  I couldn't get past my awkward discomfort with the metric system and wasn't really confident in my conversions.  (Dry grams, liquid measure?  Who knows?)  So I just went with the general recipe for focaccia in my good ol' Betty Crocker cookbook, then prepared the topping as given in the Eat Weeds version of the recipe.  Rather than brushing my dough with the olive oil, I just tossed my sliced ramps in it and let them sit a bit while the dough was rising, then proceeded with the topping. 


The parmesan and the ramps go very well together.  Grated parmesan works well for this.  I didn't have any sea salt on hand, then forgot that I at least had kosher salt, but ended up using regular table salt instead.  This worked out fine too.

As I have time, probably on Friday, I am going to try Eat Weeds recipe for Pickled Wild Garlic.  Some other recipes that sounded good to me were Wild Garlic Pesto, Wild Garlic Soup and Wild Garlic Risotto - all found on another UK blog called Growing Wild.  I would have spent more time surfing, but unfortunately I've still got chickens to put up for the freezer!

If ramps aren't your thing, do go ahead and make the focaccia.  I promise you, you'll not regret it.  Other good toppings to try would be caramelized onions, olives or sauteed mushrooms.

Yellow Morel (Morchella Species)

Speaking of mushrooms, I did get back out to hunt morels this past Monday.  I should have been home doing any number of productive things, but the woods were calling to me and after last weekend's heavy rains, I just knew my yellow morels would have to be up.


I went by myself and spent about four hours hiking and listening to the sound of recent rainfall cascading down numerous rocky streams.  The day was sunny, but not too warm and the breeze was heavenly and fresh after the cleansing rains.  It was a very rejuvenating time and I thoroughly enjoyed my peace and quiet (having dropped my daughter off at Nana's earlier).  My husband was on a business trip for the day, so I didn't have to hurry at all.  It was such a nice day...and I really needed it!


I came home with 26 morels, almost all yellows.  Not a bad haul.  Some were quite big!  I like the yellows better than the blacks because they have more substance to them.  They don't fall apart in your mesh bag if you run them into too many multiflora briers.

Most of these are large enough that I can try out a stuffed morel recipe I've been holding on to for awhile.  It has cream cheese in it.  Perhaps I'll post that one too, if I do end up making it...

Thursday, February 3, 2011

Curried Chicken Salad

I love curry powder and I'm going to have to find more things to put it on!

This chicken salad is to die for and shockingly good for you too.  Serve it up on flat bread or a whole wheat pita with a little lettuce or sprouts.  Your tummy will be happy!  (And your waistline will be too.)

My Curried Chicken Salad
Prep time:  about 15 minutes,  Makes 18 (1/2 cup) servings

  • 1 lb. diced chicken (rotisserie chicken, chicken breast, or leftover chicken)
  • 1 1/4 c. light mayo
  • 2 c. seedless white grapes, cut in half (or 1 c. raisins or chopped dates)
  • 1 c. red onion, chopped fine
  • 1/2 c. celery, chopped fine
  • 2 tsp. mild curry powder
  • 1 tsp. salt
Combine all and mix well.  (How's that for easy?  :) ) Refrigerate one hour before serving to allow flavor to blend.

Nutritional Info:
(I started using http://www.myfitnesspal.com/ a couple months ago and recently discovered that they will calculate the calories, etc. in your recipes for you.  I jumped for joy when I saw how light and healthy this chicken salad is!)


Tuesday, December 14, 2010

Best Dang Deer Jerky Marinade Ever

This is my own personal recipe for deer jerky and it operates on the principle that more is...well, more!  This recipe is for marinating strips of meat, although I am going to try it out, adding a little bit at a time to ground meat to make snack sticks with a jerky gun now that I have one.  It's a very forgiving recipe, so by all means feel free to taste and tweak.  I have fun omitting and adding different ingredients to get special blends.  This that follows is the basic recipe.


My Original Jerky Blend

  • 1 tbsp. salt
  • 1/2 tbsp. black pepper
  • 3 cloves of garlic, minced (or 1 tbsp. garlic powder)
  • 1/4 c. soy sauce
  • 1/4 c. Worcestershire
  • 1/4 c. water
  • 1/8 c. white or cider vinegar
  • 1/2 c. of Tabasco sauce
  • 2 tsp. liquid smoke
  • 1 tbsp. sorghum molasses
  • 1 tsp. crushed red pepper
  • 3 lbs. venison, cut into 1/4" thick strips

I prefer to use the hindquarters for jerky.  Sometimes I'll toss in a few of the larger pieces from the shoulder.  You could use the tenderloin too, but in this house that is considered a sacrilege. 

I am very particular to say the least and I will remove all large sections of the tough muscle casing (silverskin) because it aggravates me to no end to bite into a piece of jerky that I cannot chew.  You can cut your strips with the grain of the muscle if you like or if you want it just a little easier to chew you can cut against the grain like you would for a steak.  Try to keep all your pieces about the same thickness (about 1/4") so that they will dry uniformly.

Mix all your ingredients together in a separate bowl.  Pour over the meat and mix well.  Cover and marinate in the fridge for 12-24 hours.

Take a wire cooling rack and set it on a cookie sheet that has been lined well with foil.  Lay out your strips.  It's OK if they touch a little, just don't overlap.

Bake in a 200 degree oven for 7-8 hours.  Rotate the trays (if you are doing multiple trays of jerky) top to bottom every couple of hours for even drying.  Halfway through your drying time, flip the strips over.  Alternately, you can use a dehydrator if you have one.  My mom just got me one the other day and I am getting ready to try it out. 

Either way, check on your jerky every so often until you achieve the perfect dryness.  You should be able to bend it, but it should be dry and dark all the way through.  If it is too hard to bend or it cracks, you've gone too long and overcooked it.  Store at room temperature in Ziploc bags or a container with a tight-fitting lid (assuming it hangs around that long.)

I've done a few variations on the recipe above and it's really fun to experiment and see what kind of blends you can come up with.  I have doubled the Tabasco and crushed red pepper for an extra spicy batch which was pretty popular with the guys.  Another favorite version was a sort of teriyaki blend where I omitted the Tabasco and red pepper and added in 1/4 c. of onion powder, 1/4 c. packed brown sugar and increased the molasses to 1/8 c. (sorghum is the best, but regular molasses will work too.)  Sometimes I will toss in a little steak sauce or horseradish if I have it on hand.  Spices like marjoram or rosemary would add a little something special to it too.

Play around with it and have fun.  Taste it before you put it on the meat to see if you want to add anything.  You'd think that with all those different things mixed in there it would be a mess, but it's really good!

I've got one more deer to butcher and I'll probably be done for now.  My dad has been quite the deer slayer this year and sent two extra does our way.  I am getting ready to do up some venison summer sausage next.  I've been keeping really busy (as you can imagine at this time of year).  Oddly enough, I have lots of things to blog about, but I have been really pressed for time.  I'll get you caught up here soon!  I've got some crafty projects coming your way in the near future.

Wednesday, August 25, 2010

Hot Pepper Mustard


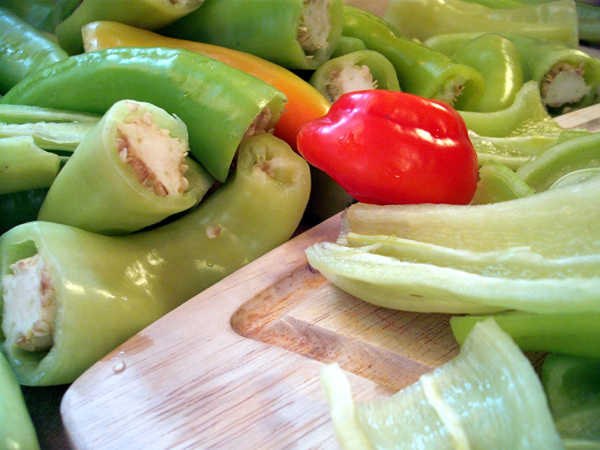
Ok, I've been canning for 2 weeks straight!  I put up lots of goodies for winter and I've lost count now how many batches of this sweet/hot pepper butter I've made.  I've given away a few jars to friends and family and have had several requests for the recipe, so here it is...

You won't find this recipe in the Ball Blue Book.  My guess is that they don't approve of it because it contains flour as a thickener.  I've made hundreds of jars of this and have yet to have had any go bad.  My dad loves this stuff and if you could can it in gallon jars, he'd be all for it!

It is the perfect dipping mustard.  We like it with cheese and summer sausage, on ham or turkey sandwiches, for dipping pretzels and it also makes a great glaze for a baked ham or venison roast.

I originally got this recipe from a lady at my dad's church.  My dad then ran over to Ohio and bought a bushel of U-Pick hungarian hot wax banana peppers and begged me to make him a lifetime supply of mustard.  The original version was a little too flaming hot and salty for our tastes, so I've tweaked it a bit and clarified the directions a little.  Here's my version...

(UPDATE:  08-02-11 -- I have later come to learn that using  flour as a thickener is considered a big no-no according to official canning standards (as per BBB and University Ag. Extension agents.)  I will tell you that I have made many batches of this mustard and have never had any trouble with it.  Also the older lady from my dad's church who gave me the recipe has been making it for years. 

Clear-Jel (Cook-Type only, instant will not do) is considered the only acceptable thickening agent for canning.  The concern is that the flour may inhibit the jar from heating thoroughly all the way through.  I do not recommend making this in quart jars, for this reason.  If you do choose to make this recipe, I just want you to be aware of this issue and be sure that you process your jars properly and for the recommended length of time.  You may want to try it with the Clear-Jel (Cook-Type) to be on the safe side.)

**********

(UPDATE:  10-16-14 -- I just canned up two batches today using the Clear-Jel (Cook-Type) instead of flour.  It takes less Clear-Jel than flour to thicken.  1/2 to 3/4 of a cup is plenty.  The consistency is just as nice as flour and actually tastes a little better I think.  

I bought a new rack for my BWB canner and since it doesn't have dividers, I can fit 13 half-pints into one batch.  That still leaves about 6 half-pints more in the pan, so either leave it on a low setting to wait or you could divide the measurements of the batch in half.  I ended up with 36 half-pints of pepper butter.  Guess that will be what everyone is getting for Christmas this year.)

Hot Pepper Mustard (Butter)


(yields about 7 pints)
  • 4 quarts chopped hot and/or sweet banana peppers (3.3 lbs or about 36 large peppers)
  • 1 qt. vinegar
  • 1 qt. prepared yellow mustard (don't go cheap, get a good quality mustard)
  • 4 c. sugar
  • Clear-Jel (Cook-Type) -or- 1&1/4 c. flour 
  • 2 tbsp. salt (optional; I use 1 tbsp.)


1. Wearing vinyl gloves, cut up and deseed/devein the peppers.  Remove stem and blossom ends and cut into large chunks.  You can toss in some of the seeds if you want it really hot.  I go about 50/50 on the ratio of hot and sweet banana peppers.  This gives it a kick without burning your tongue off!


     I also like to take a few dark red peppers aside and chop them by hand before adding to the pot.  They look really nice suspended in the golden yellow of the mixture.


2. Puree the peppers in a blender using some of the vinegar.

3. In a large pot, combine all ingredients except the flour.

4. In a small bowl, add enough water to the flour to make a smooth paste.  Be sure to work all the lumps out.

5. Add flour paste to the mixture.

6. Simmer over medium heat until thickened, stirring occasionally to prevent sticking.


IMPORTANT -- Try not to let the mustard boil as this will incorporate air bubbles into the mixture.  Air bubbles are the number one cause of the mustard boiling out of the jars in while in the water bath.  If you think it looks bubbly, let it sit awhile on the lowest heat setting until they are gone.  Stir gently.

7. Pour into hot jars leaving 1/2" headspace.  Wipe rims and place lids.  Hot water bath 15 minutes for pints and half-pints.


Enjoy!

I made a bunch of half-pints to give as Christmas gifts.  I try to can something special every year just for that purpose.

Well, now I am on to green beans.  I picked 5 gallons this week.  I am loving my Nickell heirloom pole beans I got from Sustainable Mountain Agriculture, Inc.  They are so tender and flavorful.  I am saving seeds for trading and may do a giveaway later on.

The garden is close to finishing up.  I have a few fall crops to put in yet.  I am getting ready to till the main garden up and plant it to buckwheat for my bees (who are doing great, btw.)  August is really my busiest time of year!

Friday, May 14, 2010

Strawberry Freezer Jam

It's Heaven, in a jar.  And ridiculously easy to make.


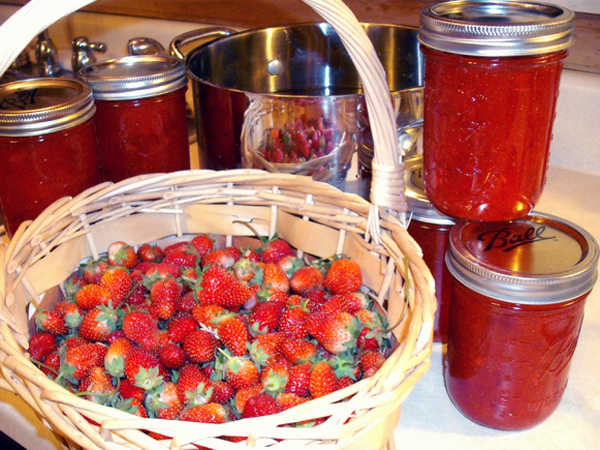
My twenty-five poorly attended junebearing strawberry plants of the Sparkle variety have turned into a strawberry jungle.  There are surely one thousand runners in there.  But that's ok, because junebearers yield better on last year's runners anyway.  So I am up to my eyeballs in strawberries.  Every two days I get about 3 pints.  They are just getting started!

Ava is in pure bliss.  Strawberries are her favorite fruit and between the junebearers and the everbearers, we'll have strawberries most of the summer except for the hottest part.  Ava won't help me pick them, but she likes to eat them.  Think of the story "The Little Red Hen".

If you've never made strawberry freezer jam before, you should give it a try.  It's very easy and it doesn't require any special canning equipment.  I use wide mouth pint jars, but you can also use those plastic freezer containers.

The U-Pick strawberry farms will be opening here very soon and usually run for about a month.  They also sell already picked berries by the pint or gallon, but you'll pay a little more than if you pick them yourself.  Store bought strawberries will work too, but are not nearly as good as fresh picked berries.

This is a time tested recipe.  It is included with any box of dry fruit pectin, but in case you don't have it, here's the recipe:

  • 2 cups crushed strawberries

  • 4 cups sugar

  • 1 box of dry pectin

  • 3/4 cup of water


1)  Crush berries, one cup at a time, using a potato masher.  (Do not puree.)

2)  Measure exactly 2 cups of berries after crushing and pour into a large bowl.

3)  Measure and add exactly 4 cups of sugar and stir well.  Let sit for 10 minutes, stirring occasionally.  (Reducing the sugar or using sugar substitutes will result in failure of jam to set.  (Try "Sure-Jell for Less or No Sugar Needed Recipes Fruit Pectin for no- or low-sugar jam.)

4)  Meanwhile combine water and pectin in a small sauce pan.  Heat over med-high and bring to a boil.  Continue boiling for one minute.

5)  Pour pectin mixture into strawberries and stir for 3 minutes until the sugar is mostly dissolved.  Skim foam if needed.

6)  Ladle into clean jars.  Wipe rims clean with a damp cloth and put on the lids.

7)  Allow jam to stand at room temperature for 24 hours until set.  Keep in the refrigerator for up to a month or store in the freezer for up to a year and thaw in the refrigerator as needed.  Yields 5 half-pints.

Don't say one word about all that sugar.  It's worth every calorie.  Just don't eat the whole jar and you'll be alright!  (Although it's very likely you'll want to.)

Wednesday, February 10, 2010

Foolproof Dark Chocolate Fudge

Ok, how about another recipe!  Dark chocolate fudge with black walnuts--I made this the other day and although I set aside a baggie for my mother-in-law (also a great lover of dark chocolate), there is very little left now.  This might even be something you fellas could do to surprise your sweetie for Valentine's Day.  As the title says, I promise you it truly is foolproof!  And when she says, "oh honey, you really shouldn't have" (interpret--"you've just gone and ruined my diet"), you can point how how heart healthy dark chocolate and walnuts are.  You know, antioxidants and omega-3's and all that good stuff.  :)

Foolproof Dark Chocolate Fudge


  • 3 (6 oz.) pkgs of bittersweet (60% cacao) chocolate chips (equals 3 cups)

  • 1 (14 oz.) can of sweetened condensed milk

  • a dash of salt

  • 1/2 to 1 cup of chopped nuts

  • 1 1/2 tsp vanilla extract


In a heavy saucepan over LOW heat, melt chips with condensed milk and salt, stirring constantly.  Remove from heat.  Stir in nuts and vanilla.  Spread evenly into a wax paper lined 8" or 9" square pan.  Chill 2 hours or until firm.  Turn fudge out onto a cutting board and cut into squares.


See?  Easy!  I had some black walnuts I had collected from a tree on my mother-in-law's property last year and had been saving them for something special.  They were perfect in this fudge.  I lightly roasted them at 300 degrees for a couple minutes which adds a smokey flavor to the nut and I hear also makes them even healthier. 


It takes a long time to hull out and crack black walnuts with a hammer.  The effort is well worth it.  Their flavor cannot be beat and the regular walnuts you buy at the store for cooking cannot compare.  I feel sorry for people who don't have black walnut trees where they live.  They don't know what they are missing!  They literally grow like weeds around here, but it takes a little time to locate a tree that produces good quality, large nuts.  Like I said, it is a lot of trouble to crack them, so you hope to get a lot of nutmeat out of them.  One of these days I am going to invest in a heavy-duty nut press for these types of hard shelled nuts.


So this fudge is so easy you have no reason not to give it a try.  Pecans or hazelnuts (filberts) would also be great in it.  If you surprise your sweetie for Valentine's Day, drop me a comment and let me know how it went.  :)

Tuesday, February 9, 2010

Vinegrette Tuna Salad Sandwich

Well, since there is not much going on in the garden this time of year, I think I'll share some recipes.  This is what we had for dinner tonight.  I got this recipe for tuna salad from the coffee shop I worked for in college.  Well, they didn't give me the recipe (they were very secretive with their recipes).  I played around with it until I got it right. 

It is very good for you!  Tuna is of course pure protein and an excellent source of Omega-3's.  The onion and olive oil are very heart healthy, parsley is very high in iron and bell peppers are chock full of antioxidants.  This would be good for "diet food", but definitely fills you up and gives your body good fuel for the day.  I prefer this version over any of the mayo-based tuna salads.  The cider vinegar gives the tuna a clean taste, not fishy at all.

Vinegrette Tuna Salad


  • 4 regular size cans of tuna in water, drained well

  • 1/2 of a large red onion, diced

  • 1/2 of a red bell pepper, diced

  • a handful of fresh parsley, chopped

  • 1/4 tsp salt

  • 1/8 tsp black pepper

  • 1/8 cup extra virgin olive oil

  • 1/8 cup apple cider vinegar


Combine all and mix well.  The flavor is best if you let it sit in the fridge for a few hours to blend.  I like to serve it up on either a hard Jewish rye bread or in a whole wheat pita pocket with a slice of sharp cheddar cheese and toast it on my George Foreman grill.  Then I add alfalfa sprouts, but lettuce would be good too.  Yummy!  And very satisfying.

Thursday, October 15, 2009

Definitely a soup day.

Ava and I got chilled to the bone trying to hurry up and plant some thornless blackberry starts ahead of the rain.  After stoking up a good fire, I decided soup was definitely on the menu for the evening!

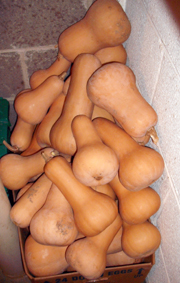
I planted 16 Waltham butternut squash vines this summer and they were very prolific.  I ended up with a stockpile of nearly 100 squash heaped in a dark corner of my basement.  Certainly enough to last through winter.  Don't be surprised if I give you squash for Christmas!

Butternut Squash


Potato soup has long been my favorite, but last year I came up with the following recipe for butternut squash soup, which in my book far surpasses potato.  This is my own version and after a several batches, I believe I have finally reached perfection.  The coffee shop I used to work for in college served homemade butternut squash soup and I was always too picky to try it.  I did not realize what I was missing out on!  It is creamy and savory, slightly sweet and the ginger makes for a pleasing accent.  Serve it up with the firmest, crustiest bread you can find, like a chewy french or artisan bread, lightly toasted and buttered.  Good stuff! 

Butternut Squash Soup


  • 1 large or 2 small butternut squash

  • 2 medium yellow onions, sliced

  • 2 (14 oz.) cans of chicken broth

  • 1/2 stick of butter, plus 2 tbsp.

  • 1 tsp. of ginger (or more, to taste)

  • 1 tbsp. salt

  • 1/2 tsp. black pepper

  • 1 cup heavy whipping cream


  1. Using a veggie peeler, remove all skin from squash, cut into 1-2" cubes.

  2. Place squash in a large soup pot and add just enough water to barely cover, toss in a little salt, cover with lid and bring to a boil.  Reduce heat and simmer until squash is tender.

  3. Meanwhile, in a skillet, melt 2 tbsp of butter and saute onion until caramelized.

  4. Drain squash, reserving the water.  Add in carmelized onion and puree in blender until completely smooth.

  5. Return puree to pot and add the chicken broth, 1/2 stick of butter, ginger, salt and pepper.  Add enough of the reserved cooking water to reach desired consistency.

  6. Over medium-low heat, slowly bring the soup back up to a simmer, stirring occasionally.

  7. Remove from heat and stir in the heavy cream.  Serve with bread and enjoy!


Also, I recently learned that you can eat butternut squash seeds, just like pumpkin seeds.  (They are related.)  Wash your seeds, drain and spread out on a cookie sheet.  Sprinkle with a little melted butter and salt to taste.  Toast in a 325 degree oven, stirring occasionally, until lightly toasted.  These are great just to snack on or would make a crunchy addition to a salad.